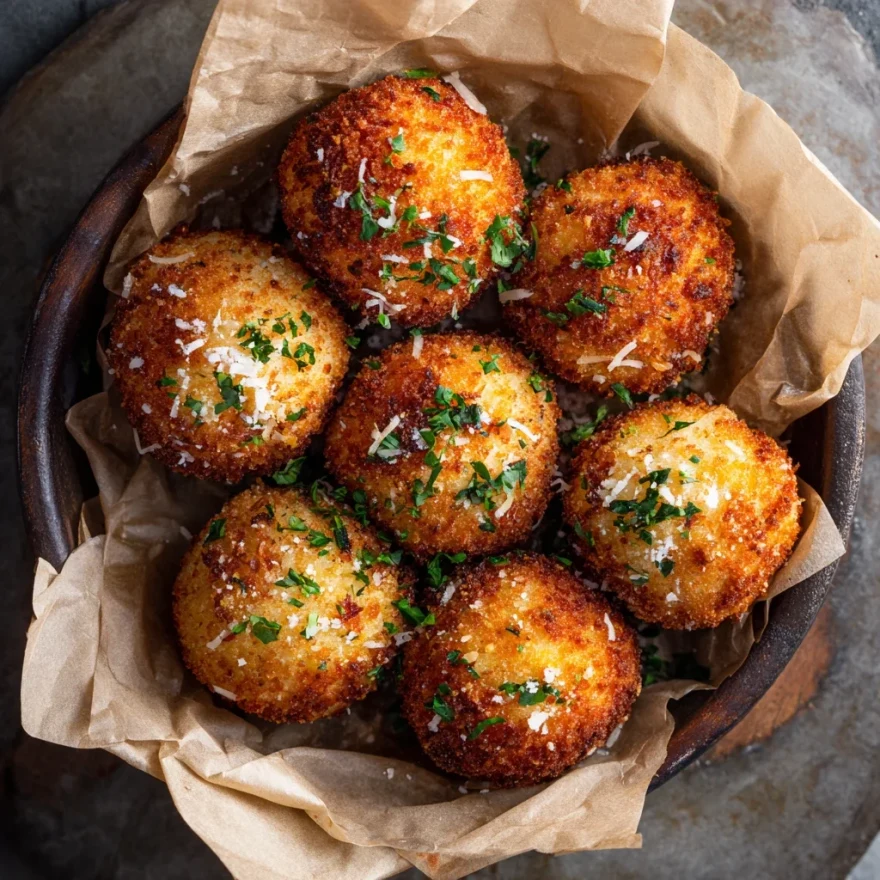
🧀 Crispy Arancini Rice Balls Recipe – Golden, Cheesy, and Totally Worth It
There’s something so comforting about biting into a warm, golden rice ball that’s crispy on the outside and soft, cheesy inside. That’s exactly what Arancini brings to the table. This Italian street-food favorite turns leftover risotto into bite-sized crunchy happiness — perfect for parties, snacks, or cozy dinners.
If you’ve ever wondered how to make authentic yet easy Crispy Arancini Rice Balls, you’re in the right place. Let’s go step by step — no fancy chef talk, just simple, friendly cooking you can actually follow at home.
🕒 Time & Servings
| Prep Time | Cook Time | Total Time | Servings |
|---|---|---|---|
| 20 mins | 25 mins | 45 mins | 12 balls (4 servings) |
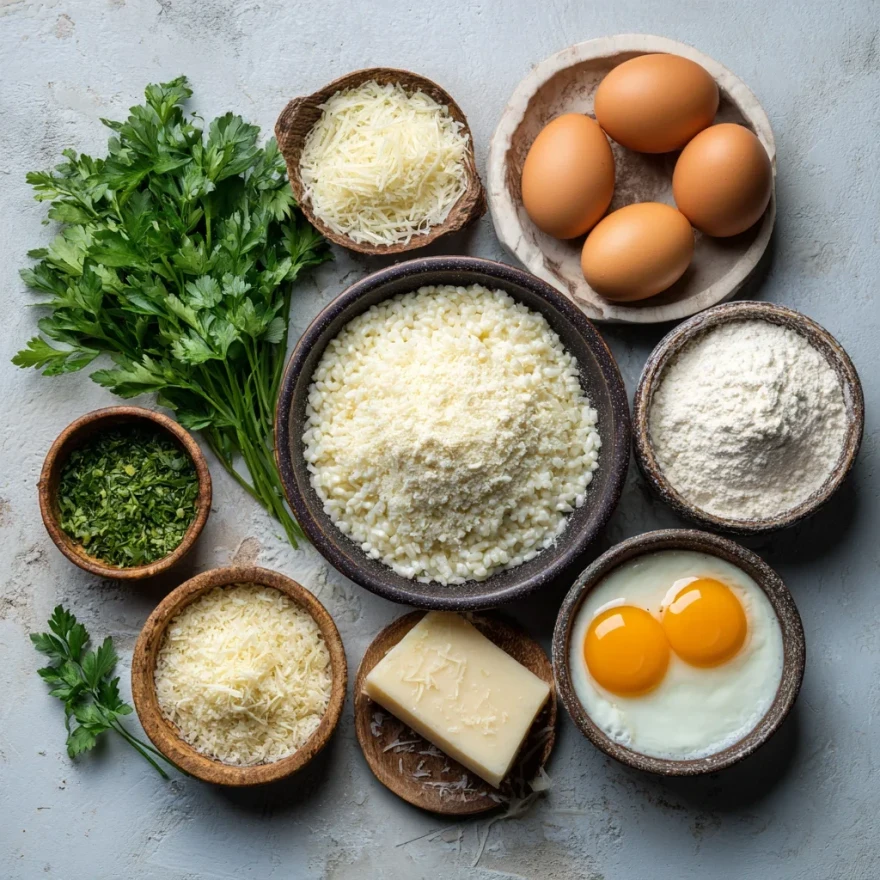
🍚 Ingredients
| Ingredient | Quantity |
|---|---|
| Cooked risotto (cooled) | 2 cups |
| Mozzarella cheese (cut into small cubes) | 100 g |
| All-purpose flour | ½ cup |
| Eggs (beaten) | 2 |
| Breadcrumbs (plain or panko) | 1 cup |
| Salt | ½ tsp |
| Black pepper | ¼ tsp |
| Oil (for deep frying) | As needed |
| Optional herbs (parsley or oregano) | 1 tbsp |
| Parmesan cheese (grated) | 2 tbsp |
👩🍳 Step-by-Step Guide to Making Crispy Arancini
Step 1: Prep the Rice Mixture
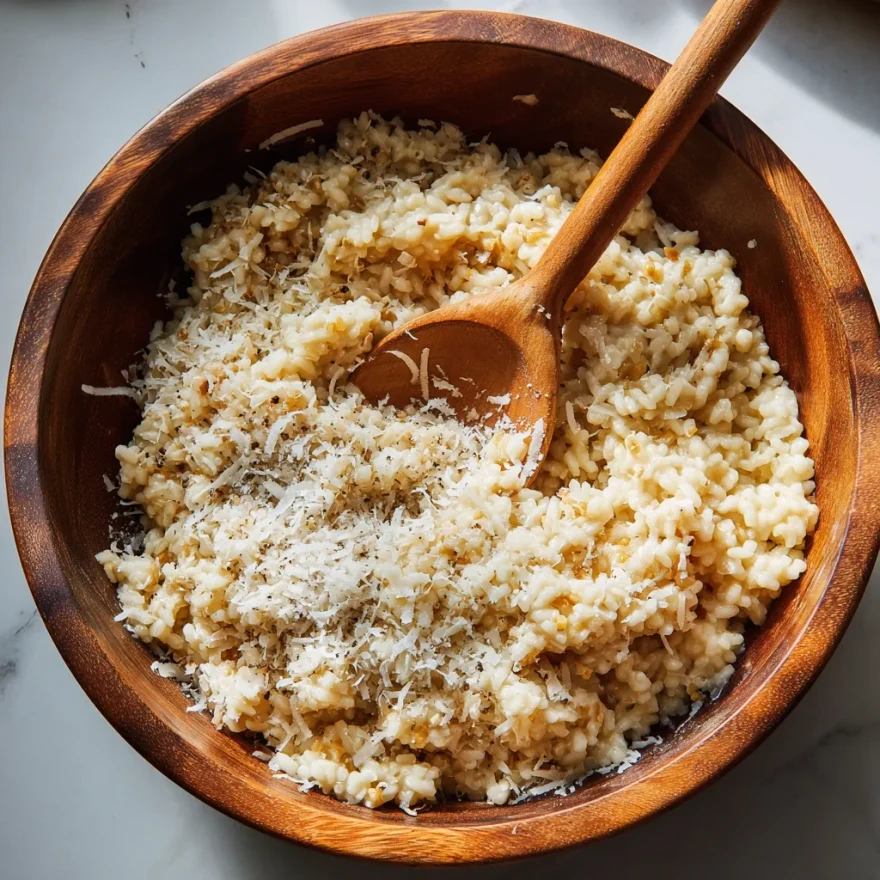
Start with leftover risotto or cook a fresh batch and let it cool completely. Cold rice holds better when shaping into balls. Add salt, pepper, and parmesan. Mix gently with a spoon or your hands. If the mix feels dry, a spoon of milk helps.
Step 2: Shape the Balls
Take a tablespoon of rice mixture. Flatten it slightly in your palm. Place a cube of mozzarella in the center and roll it into a ball. Keep them all roughly the same size — like golf balls.
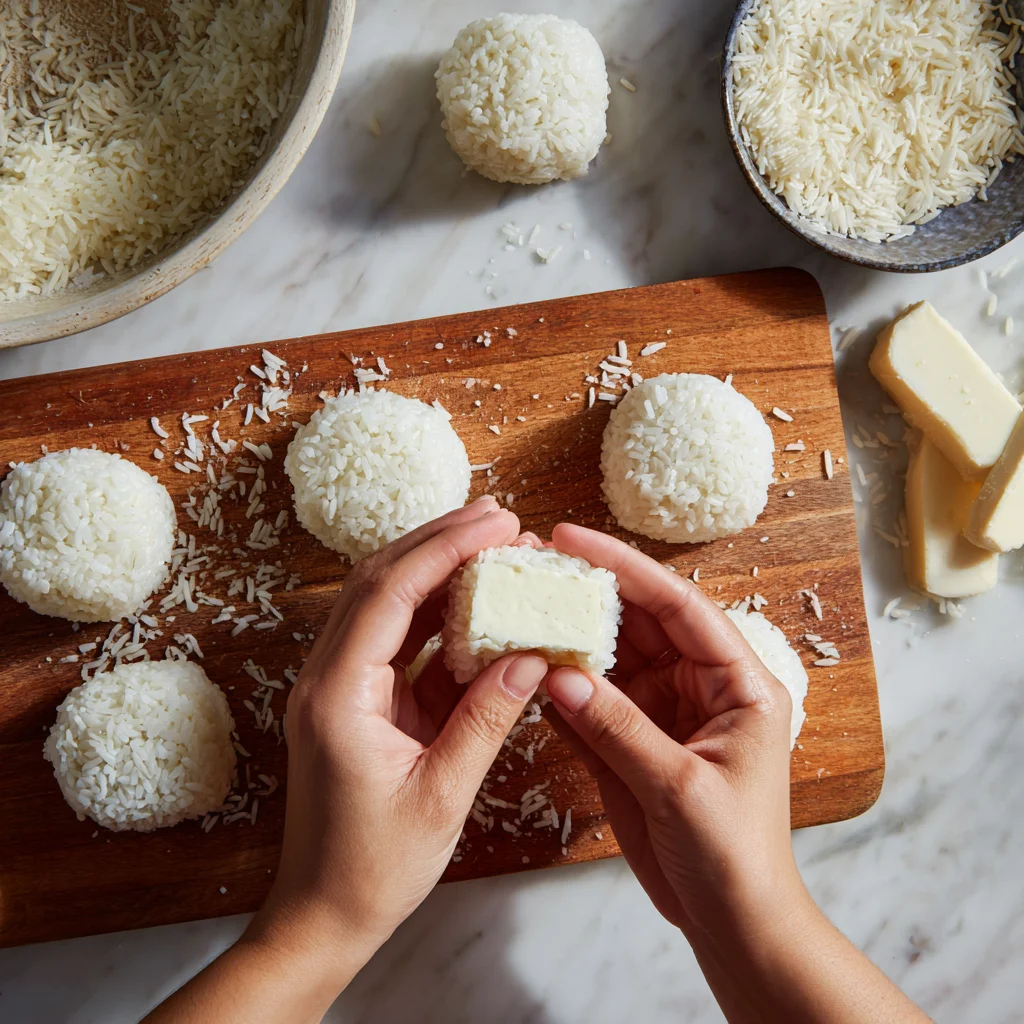
Step 3: Coat for the Crunch
Set up a coating station with three bowls — one with flour, one with beaten eggs, and one with breadcrumbs. Roll each rice ball in flour, dip it in egg, then coat it evenly with breadcrumbs. That’s the secret to the crispy golden shell.
Step 4: Chill Before Frying
Place the coated balls on a tray and refrigerate for at least 20 minutes. This helps them hold shape when frying and reduces the chance of breaking apart.
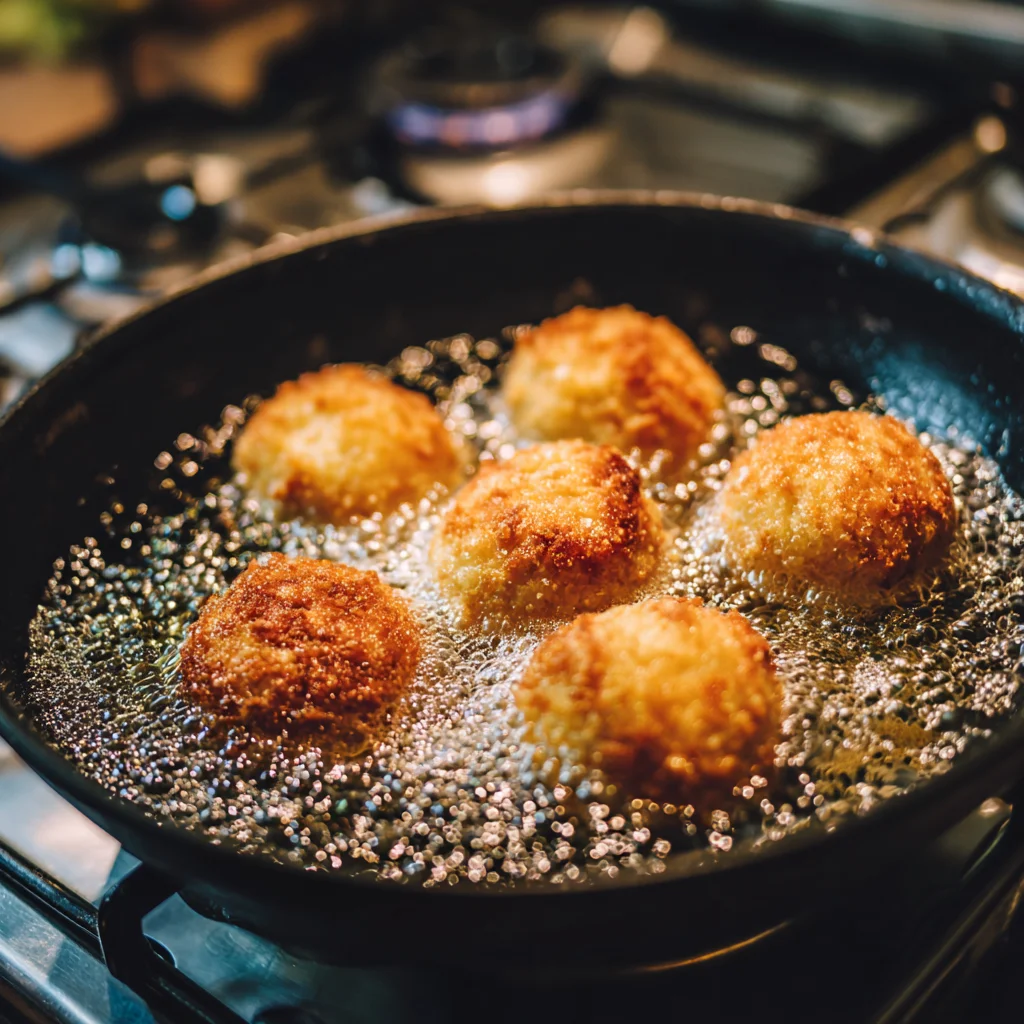
Step 5: Fry Until Golden
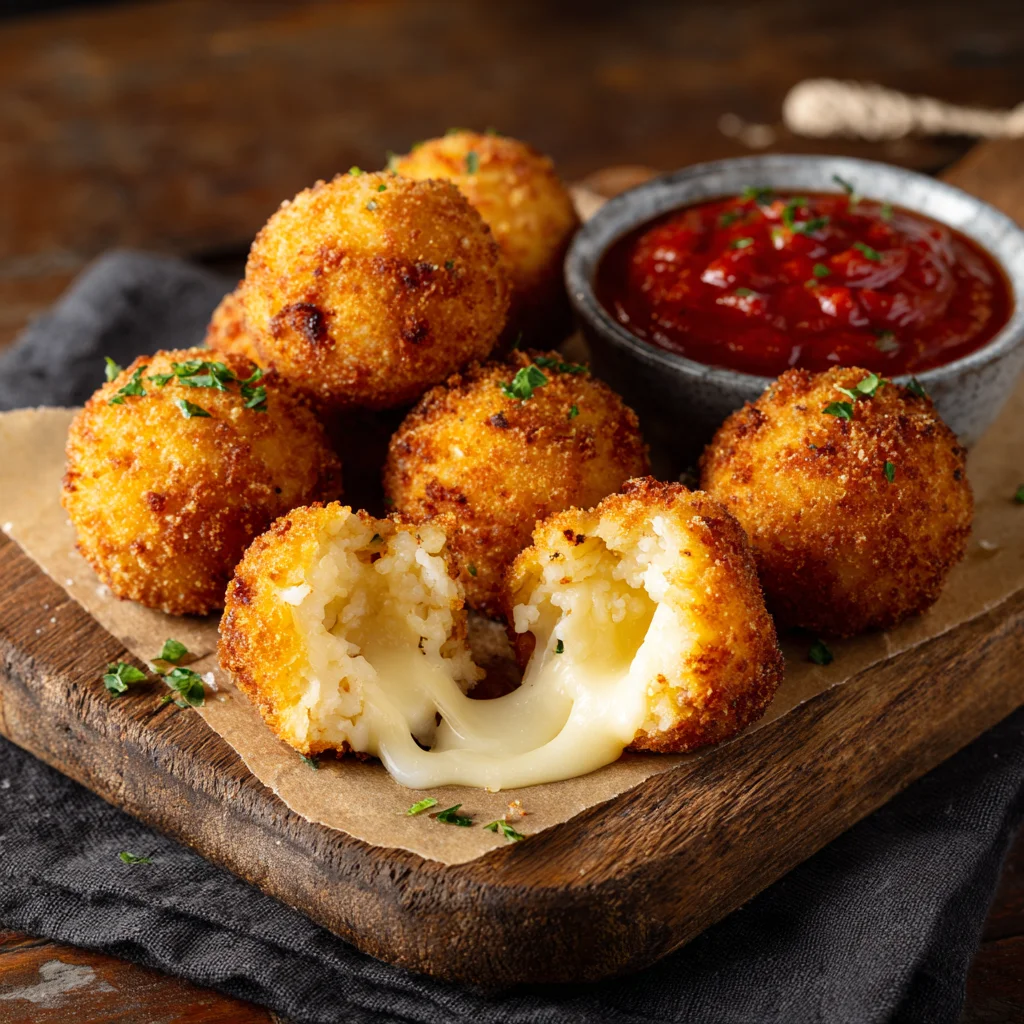
Heat oil in a deep pan on medium flame. Fry 3–4 balls at a time. Turn them occasionally so they brown evenly. When they’re golden and crisp, remove and place on a paper towel.
Step 6: Serve Hot
Serve them while warm — the melted cheese inside tastes heavenly. You’ll probably end up sneaking one before it hits the table (and that’s perfectly okay).
🍴 Serving Suggestions
These rice balls go well with so many things:
- A bowl of marinara or tomato sauce for dipping
- With green salad for a light lunch
- Alongside creamy soup like mushroom or tomato basil
- A glass of lemon iced tea or sparkling water with lime to refresh

For a light and fresh side, pair these crispy Arancini balls with a Grilled Chicken Cobb Salad with Honey Dijon dressing — it balances the richness beautifully.
🧂 Recipe Notes
- You can use any risotto flavor — mushroom, saffron, or cheese.
- For extra flavor, mix herbs like thyme or parsley into the rice.
- Use panko breadcrumbs for an airier crunch.
- Always serve hot; that’s when the cheese pull is perfect!
🧊 Storage & Reheating Tips
You can store leftover Arancini in an airtight container for up to 3 days in the refrigerator.
To reheat:
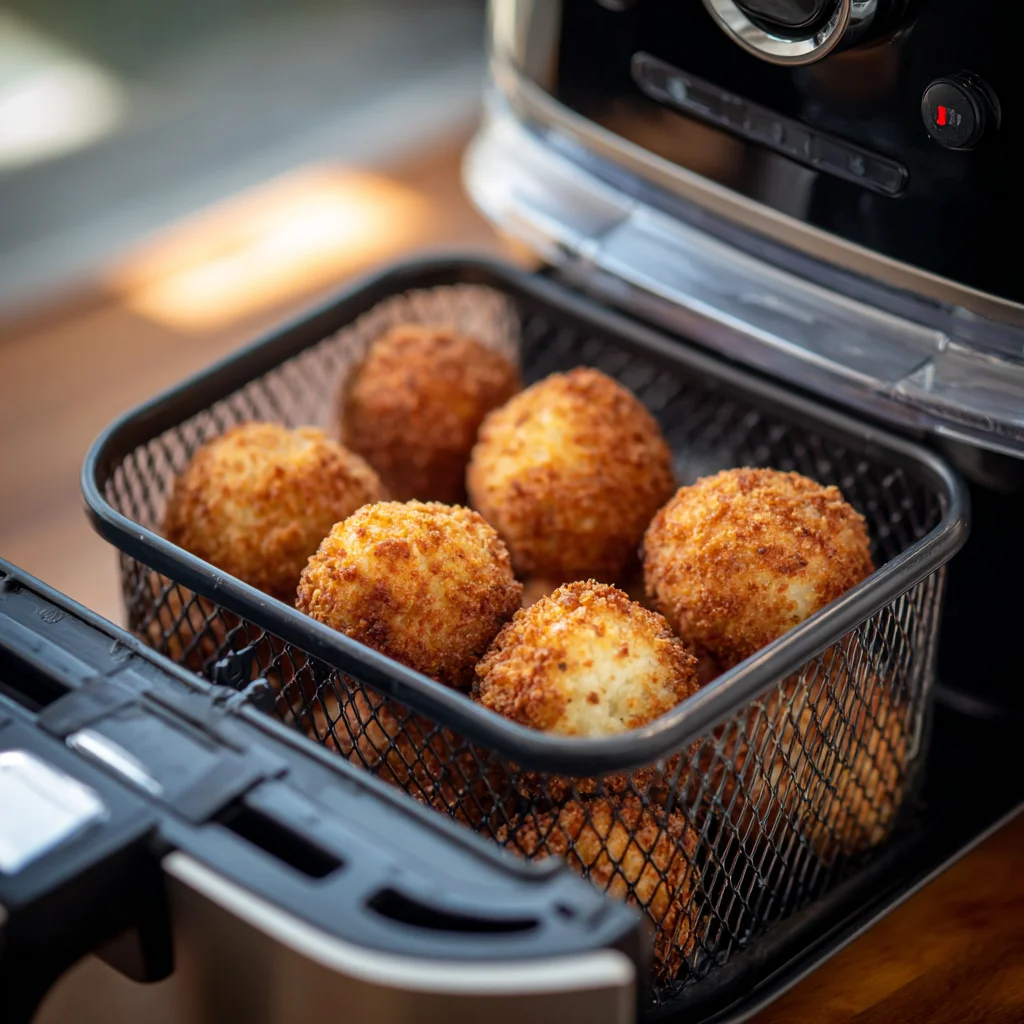
- Use an oven or air fryer at 180°C (350°F) for about 10 minutes.
- Avoid microwaving; it makes the coating soggy.
- You can freeze uncooked coated balls for up to 1 month. Fry straight from frozen — just add 2 extra minutes.
⚖️ Nutrition (Per Serving)
| Nutrient | Amount |
|---|---|
| Calories | 210 kcal |
| Carbohydrates | 24 g |
| Protein | 8 g |
| Fat | 9 g |
| Fiber | 1 g |
| Sodium | 180 mg |
| Calcium | 90 mg |
🛠️ Kitchen Tools Needed
- Deep frying pan or air fryer
- Mixing bowls
- Slotted spoon
- Paper towels
- Tongs
- Measuring cups/spoons
💡 Extra Tips to Make Them Perfect
- Don’t overcrowd the pan while frying. It drops the oil temperature and makes the balls greasy.
- Use cold rice only — warm rice won’t hold shape.
- Double coating gives extra crispiness.
- For healthier options, bake them at 400°F (200°C) for 20–25 minutes until golden brown.
🥗 Health Benefits
Even though Arancini feels like comfort food, it’s not all guilt. The rice provides energy and carbs. Mozzarella gives you calcium and protein. Using olive oil instead of vegetable oil can make it a bit lighter on the stomach. Plus, making them at home means you can control salt and oil levels easily.
🚫 Common Mistakes to Avoid
- Using wet risotto: It’ll fall apart. Always cool it first.
- Overheating the oil: The outside burns before the inside warms up.
- Skipping the chill time: The coating won’t set properly.
- Using big cheese cubes: They can leak out while frying. Keep them small.
🧠 FAQs About Arancini Rice Balls
1. Can I bake Arancini instead of frying?
Yes! Brush with oil and bake at 400°F (200°C) until golden, about 25 minutes.
2. Can I make them without cheese?
Of course. You can fill them with mushrooms, peas, or even cooked chicken.
3. How do I keep them crispy after frying?
Drain on paper towels and serve immediately. You can also re-crisp in the oven for 5 minutes.
4. What type of rice is best?
Short-grain rice like Arborio works best since it’s sticky and holds shape well.
5. Can I freeze cooked Arancini?
Yes, freeze them in a single layer, then store in a bag. Reheat in oven for 15–18 minutes.

✨ Final Thoughts
Making Crispy Arancini Rice Balls at home is simpler than you might think. It’s a great way to use up leftover risotto, and it turns into something magical — crunchy, cheesy, and deeply satisfying. Whether you serve them at a family dinner or enjoy them with friends, they never disappoint. So, perhaps next time you have extra rice, try rolling it into these little golden bites. Trust me, they’ll disappear fast.