🍪 Oreo Protein Balls Recipe – Easy No-Bake Snack for Energy & Muscle Recovery
If you’ve ever wished Oreos could fit into your fitness routine, you’re in luck. Oreo Protein Balls are the fun, chocolatey snack that satisfies your sweet tooth and keeps your protein goals on track. They’re no-bake, quick to make, and perfect for anyone who wants a gym-friendly snack without the fuss.
I started making these after workouts when I needed something that didn’t taste like chalky protein powder. They turned out creamy, chewy, and surprisingly filling. Let’s just say… once you make them, you’ll have to hide them from your family.
🍴 Ingredients (Per Batch)
| Ingredient | Quantity | Calories (approx.) |
|---|---|---|
| Crushed Oreo Thins (or similar chocolate cookies) | 6 pieces | 210 kcal |
| Vanilla or Cookies & Cream Protein Powder | 1 scoop (30g) | 120 kcal |
| Natural Peanut Butter (or Almond Butter) | 2 tbsp | 190 kcal |
| Rolled Oats | ½ cup | 150 kcal |
| Honey (or maple syrup) | 1 tbsp | 60 kcal |
| Greek Yogurt (optional for creaminess) | 2 tbsp | 35 kcal |
| Mini Dark Chocolate Chips (optional) | 1 tbsp | 70 kcal |
| Milk or Almond Milk | 1–2 tbsp | 10 kcal |
Total Calories per Ball (approx.): 85–90 kcal

🧑🍳 Step-by-Step Guide
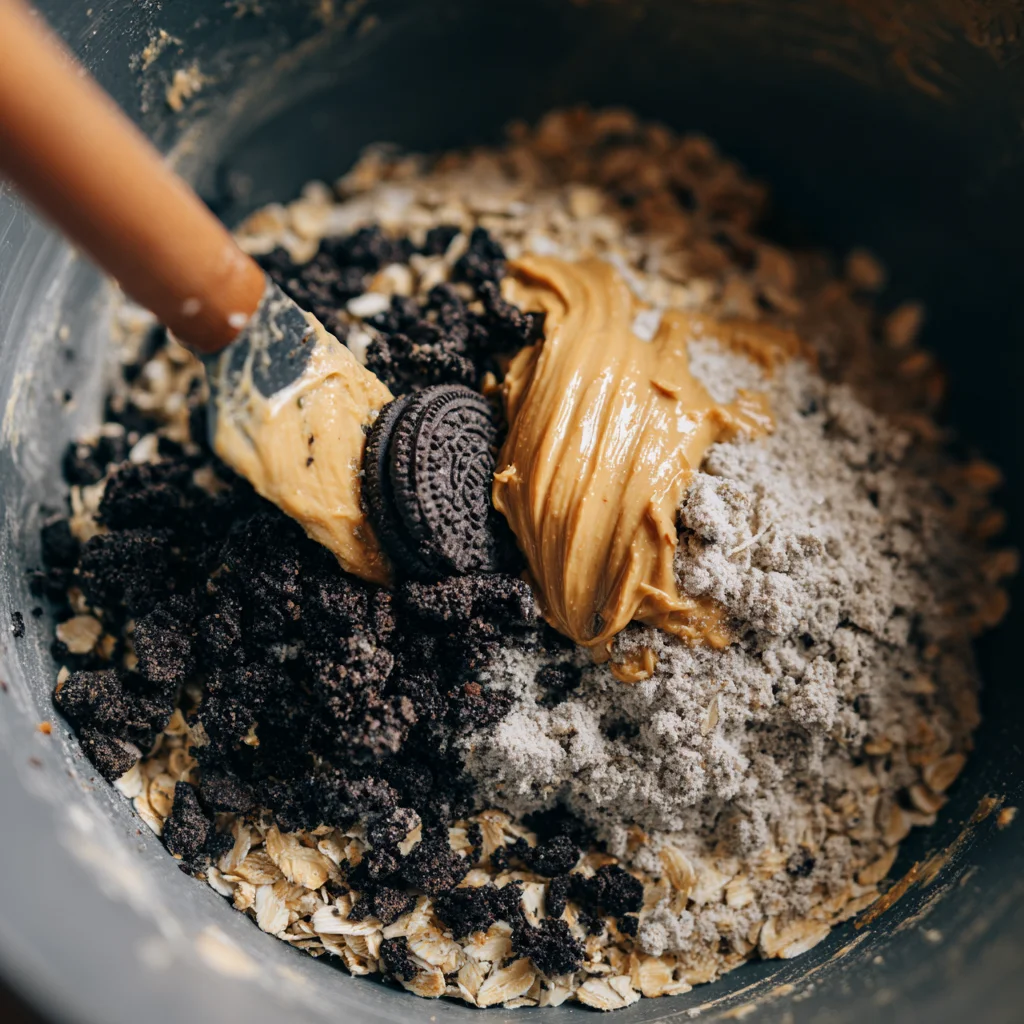
1. Crush the cookies.
Put your Oreos (or chocolate cookies) in a zip-lock bag and crush them using a rolling pin. You want small crumbs, not powder.
2. Mix the dry ingredients.
In a medium bowl, add crushed Oreos, oats, and protein powder. Stir them together until well blended.
3. Add the wet ingredients.
Drop in the peanut butter, honey, and Greek yogurt. Mix everything using a spatula or your hands until it forms a sticky dough.
4. Adjust texture.
If the mix feels too dry, add milk one tablespoon at a time. If it’s too sticky, add a bit more oats or protein powder.
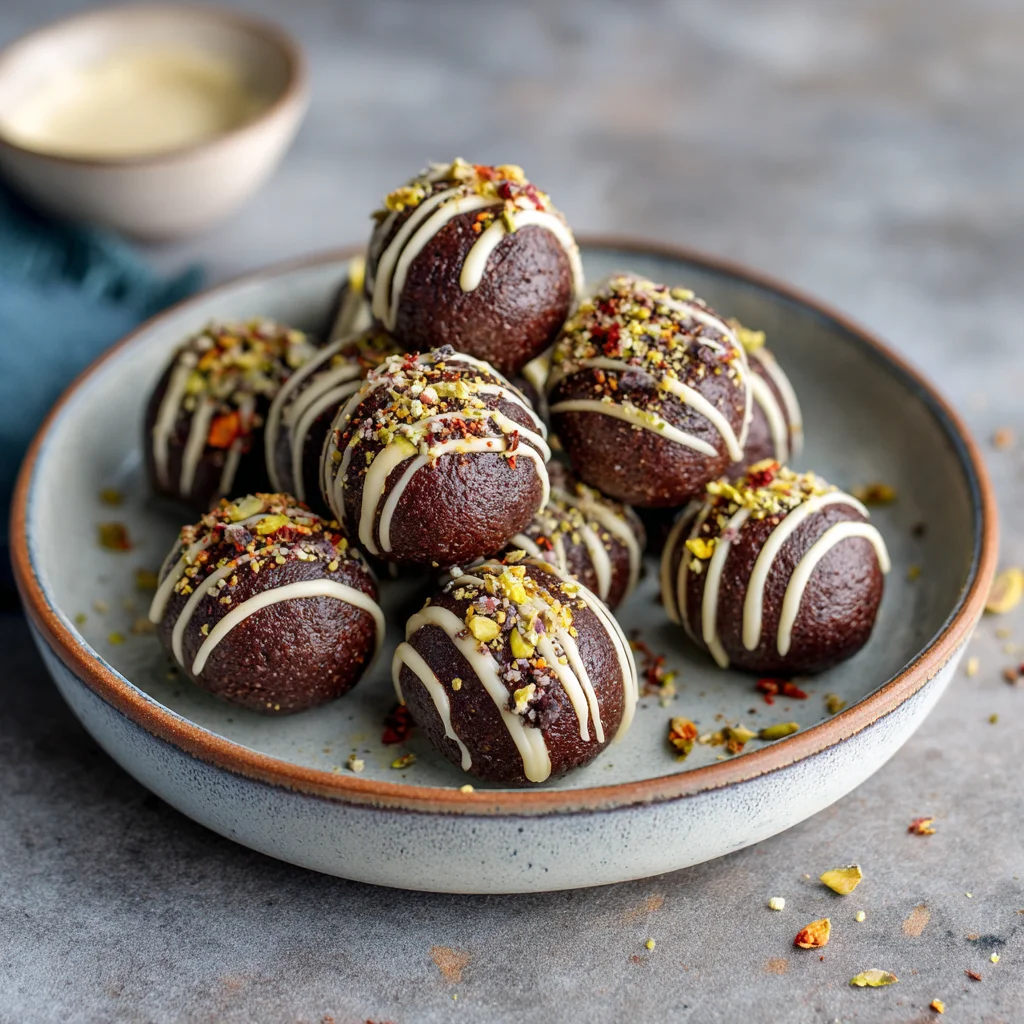
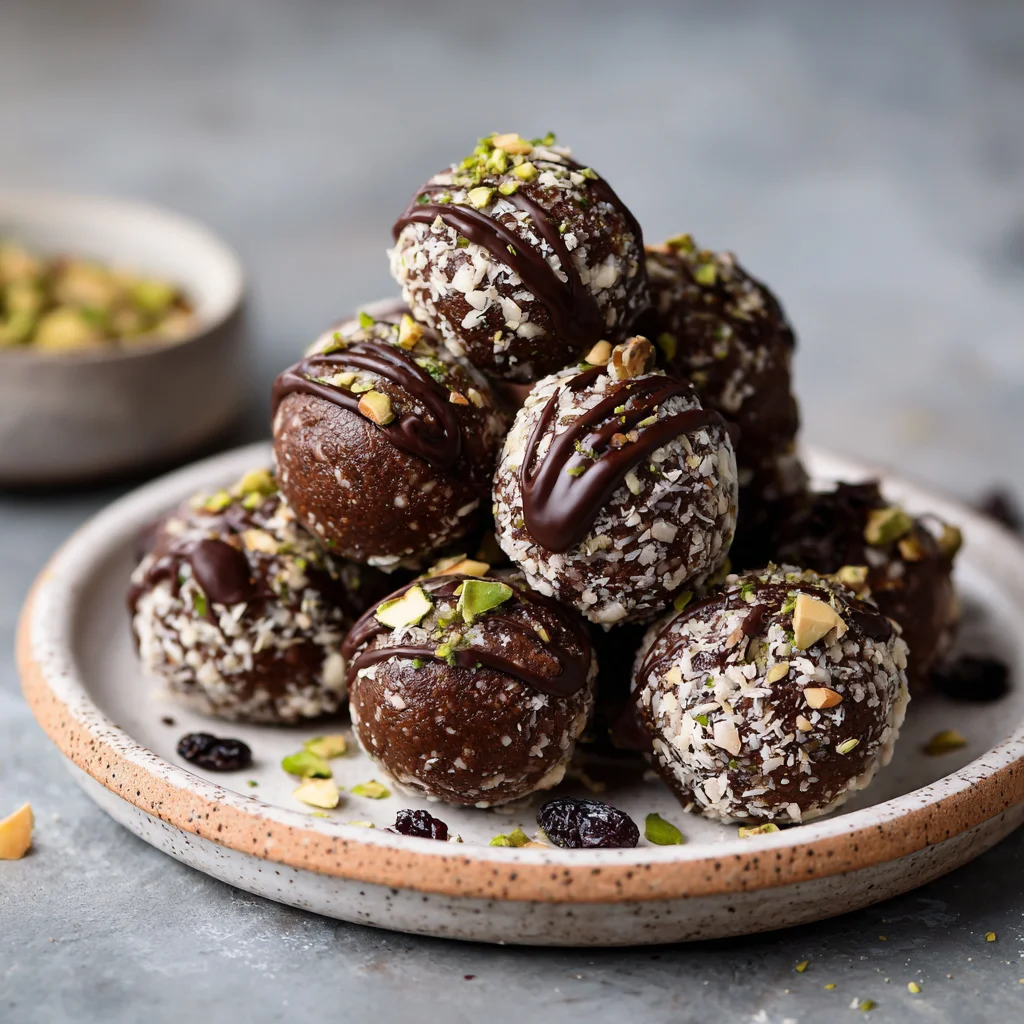
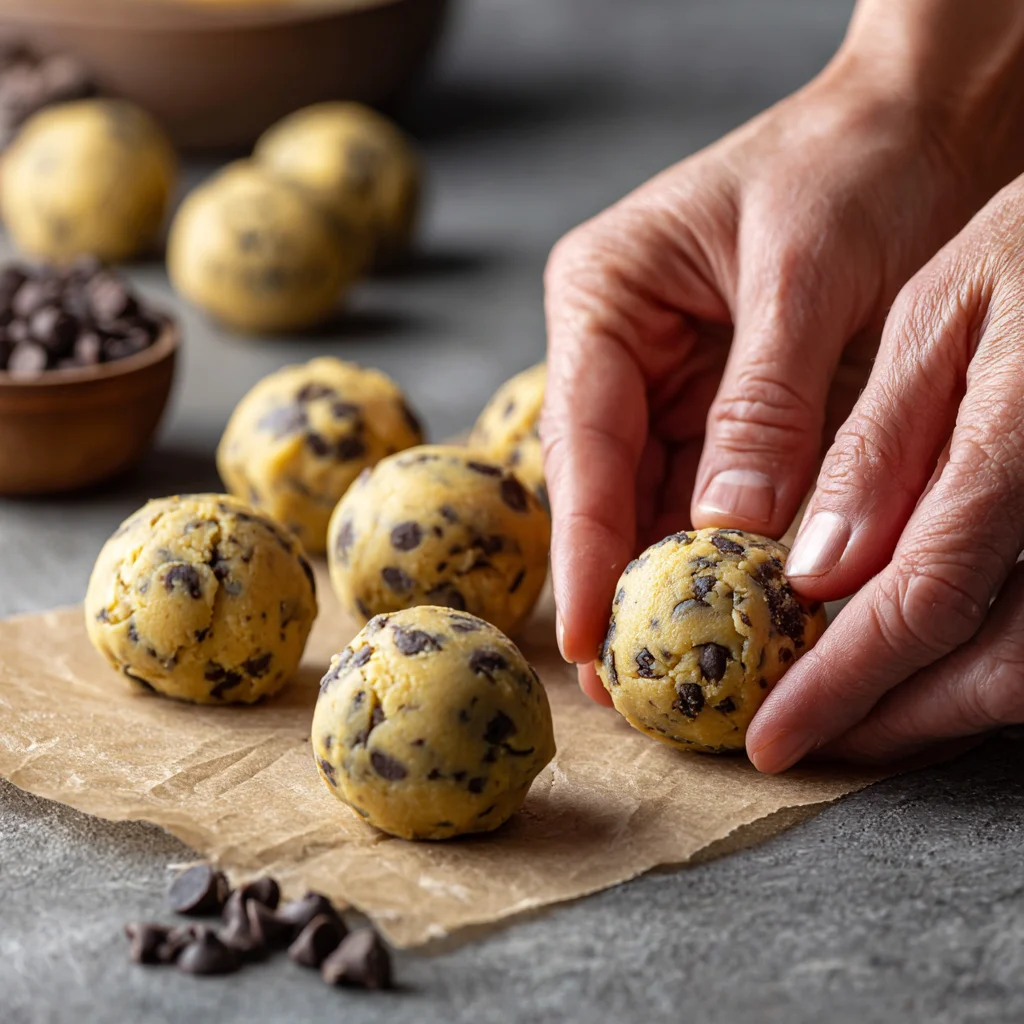
5. Shape into balls.
Scoop out small portions and roll them into bite-sized balls.
6. Add toppings (optional).
Roll the balls lightly in crushed Oreos or sprinkle some dark chocolate chips.
7. Chill before serving.
Refrigerate for at least 20 minutes. This helps the flavors blend and keeps the balls firm.
That’s it! No baking, no mess — just delicious, protein-packed bites.
🕒 Time & Servings
| Prep Time | Chill Time | Total Time | Servings |
|---|---|---|---|
| 10 mins | 20 mins | 30 mins | 12 balls |
🧊 Storage & Reheating Tips
- Refrigerate: Keep them in an airtight container for up to 7 days.
- Freeze: Store in freezer bags for up to 2 months. Thaw for 5–10 minutes before eating.
- Reheating: Not needed — they’re best enjoyed chilled or at room temperature.
💡 Pro Tip: Freeze a few and grab one whenever you need a pre-workout energy boost or late-night chocolate fix.
🥣 Nutrition Breakdown (Per Serving)
| Nutrient | Amount |
|---|---|
| Calories | 90 kcal |
| Protein | 7 g |
| Carbohydrates | 8 g |
| Fat | 4 g |
| Fiber | 1.2 g |
| Sugar | 3 g |
💡 Recipe Notes
- You can swap peanut butter for almond butter if you prefer a milder flavor.
- Use stevia or sugar-free syrup to lower sugar content.
- For vegan versions, use plant-based protein and skip Greek yogurt.
- If you’re short on time, skip chilling — they’ll still taste amazing.
For another high-protein snack idea, check out this Chocolate Rice Peanut Butter Balls recipe that combines creamy peanut butter and crunchy rice for the perfect bite.
🧰 Kitchen Tools Needed
- Medium mixing bowl
- Measuring spoons
- Rolling pin (for crushing cookies)
- Rubber spatula
- Airtight container for storage
🌱 Health Benefits
- High protein helps muscle recovery after workouts.
- Healthy fats from nut butter keep you full longer.
- Low sugar compared to regular cookies.
- Oats provide slow-release energy.
- Calcium & probiotics (if using Greek yogurt) support digestion.
These are small snacks but packed with nutrients your body loves.
👩🍳 Extra Tips to Make It Perfect
- Chill your dough before rolling if it feels sticky.
- Use a cookie scoop for even sizes.
- Add a pinch of sea salt to bring out the chocolate flavor.
- Mix in crushed protein cereal for a crunchy version.
- Drizzle a little melted dark chocolate on top for a “dessert-look” while keeping it healthy.
🍫 Serving Suggestions
- Serve with iced coffee or a post-workout protein shake.
- Enjoy two balls as a mid-day snack or pre-gym energy bite.
- Pair with Greek yogurt and fruit for a quick breakfast.
- Serve at gatherings as a guilt-free dessert platter.

⚠️ Common Mistakes to Avoid
- Too much liquid makes the dough sticky. Add slowly.
- Skipping chill time — it helps the texture set.
- Using low-quality protein powder — it affects flavor and consistency.
- Over-mixing can make them tough and dry.
- Not measuring nut butter properly — it’s easy to overdo it.
❓ FAQs
Q1. Can I make these without oats?
Yes, try almond flour or ground flaxseeds instead. The texture will change slightly but still be tasty.
Q2. What protein powder works best?
Whey isolate or a cookies-and-cream flavor blends perfectly with Oreos.
Q3. How long can I keep them outside the fridge?
About 4–5 hours in a cool place. For longer, refrigerate.
Q4. Are these good for kids?
Absolutely, just use half the protein powder and skip added sweeteners.
Q5. Can I double the batch?
Yes! Just store extra balls in the freezer — they keep perfectly.

💭 Final Thoughts
Oreo Protein Balls are proof that healthy food can taste like dessert. They take minutes to make, don’t require fancy tools, and fit into any diet plan. Whether you’re a gym-goer, a student, or just someone who loves Oreos (who doesn’t?), this recipe is a keeper. Try it once — and maybe, just maybe, make a double batch. They disappear fast!