
Perfect Stovetop Sushi Rice Recipe: No Rice Cooker Needed 🍚
Hi everyone! Welcome to my kitchen. Today, I want to tackle something that scares a lot of home cooks: making traditional sushi rice without a rice cooker.
I used to think you needed expensive gadgets to make good sushi. But honestly? You don’t. You just need a pot, a stove, and the right technique. I recently learned a fantastic method from Jun (The Sushi Man), and it changed how I look at rice. It is actually simpler than you think.
The rice is the most important part of sushi. If the rice is bad, the sushi is bad. But if you get this right, you can make amazing rolls or nigiri at home.
🍣 Why You’ll Love This Recipe
| Reason | Why? |
| No Gadgets Needed | You only need a standard pot with a lid. No rice cooker required. |
| Restaurant Quality | This method creates that perfect sticky-yet-firm texture. |
| Simple Math | The vinegar ratio is super easy to remember (8-4-1). |
| Authentic Taste | We use the traditional mixing method to cool the rice properly. |
🛒 Ingredients
Here is what you need to grab. The type of rice is the most crucial part here.
| Ingredient | Quantity | Notes |
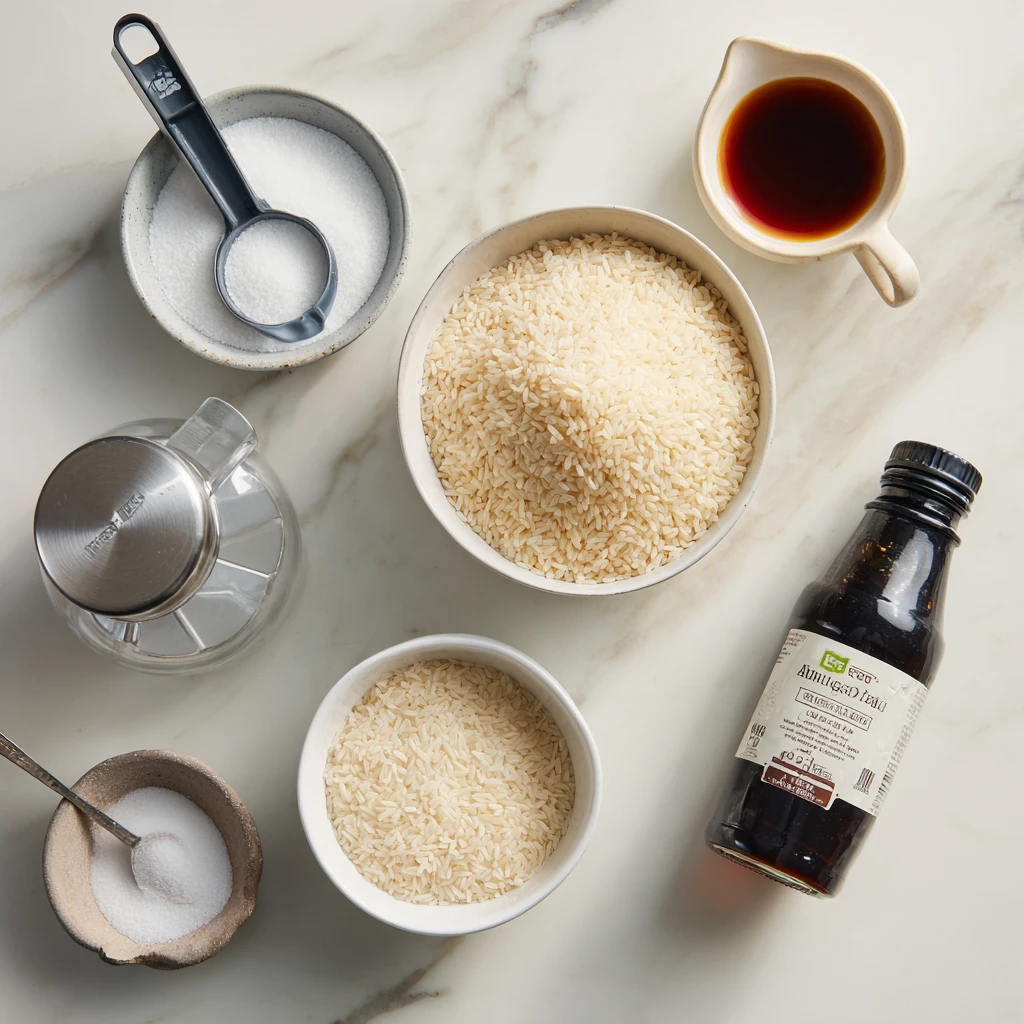
| Rice | 3 Rice Cooker Cups (540ml) | Must be Japanese Short Grain (like Koshihikari or Tamanishiki). |
| Water | 3 Rice Cooker Cups (540ml) | Cold tap water or filtered water. |
| Rice Vinegar | Part of the mix | Plain unseasoned rice vinegar. |
| Sugar | Part of the mix | White granulated sugar. |
| Salt | Part of the mix | Standard table salt or sea salt. |
Note: For the vinegar mix, we use a specific ratio explained below.
👩🍳 Step-by-Step Guide
Follow these steps carefully. The small details, like washing and soaking, make a huge difference.
1. Measure the Rice Correctly
This is where most people mess up. If you are using the plastic cup that comes with rice cookers, that is 180ml. A standard US cup is 240ml. If you use the plastic cup for rice, you must use it for water too. Level off the top so it is nice and flat.
2. The Gentle Wash
Put the rice in a bowl with cold water. Swirl it around gently with your hand. Don’t scrub it hard. The water will turn white (cloudy) immediately. Dump that water out fast so the rice doesn’t absorb the starch.
Repeat this swirling and draining process about 4 to 5 times until the water looks nice and clear. Drain it well using a sieve.
3. The Soak (Crucial Step)
Put the washed rice into your pot. Add the exact same amount of water. Since we used 3 rice cups, add 3 rice cups of water (540ml).
Make sure the rice is flat and fully under the water. Let it sit and soak for 20 minutes. This helps the grains cook evenly.
4. Make the Sushi Vinegar
While the rice soaks, grab a small pot. Combine your vinegar, sugar, and salt.
The Golden Ratio is 8-4-1.
That means 8 parts vinegar, 4 parts sugar, and 1 part salt. Warm it up on low heat just until the sugar dissolves. You don’t need to boil it. Let it cool down.
5. Cooking on the Stove
Cover your pot. Turn the heat to medium and bring it to a boil. This takes about 5 or 6 minutes.
Once it boils, turn the heat down to low. Cook it for 12 minutes with the lid on tight.
After 12 minutes, check quickly to see if the water is gone. If it is, turn off the heat. Let it steam with the lid on for another 10 minutes.
Don’t skip the storage trick — it’s at the end of the post
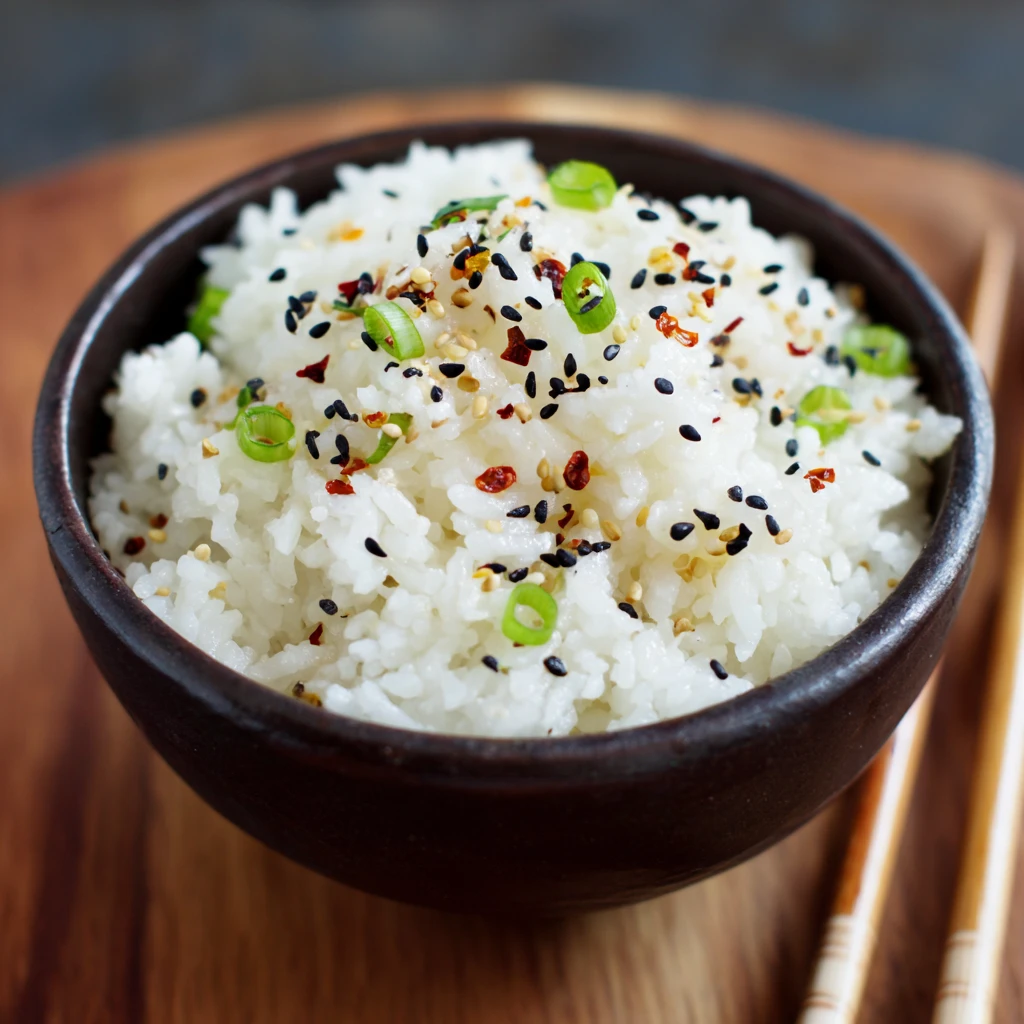
6. The Mixing Technique
If you have a wooden tub (Hangiri), wet it first so the rice doesn’t stick. Dump the hot rice into the tub.
Pour your vinegar mixture over the rice paddle so it sprinkles evenly.
Use a “slicing” motion with the paddle. Don’t mash the rice! Slice through it and fold it over gently to coat every grain. Fan the rice to help it cool and get glossy.

📝 Recipe Notes
| Note | Tip |
| The Wooden Tub | If using a Hangiri, fill it with water for 10 mins before using, then wipe it. This stops the wood from stealing vinegar from the rice. |
| Rice Type | Do not use Jasmine or Basmati. You need the starch content of short-grain rice. |
| Vinegar Prep | You can make a big batch of the 8-4-1 vinegar mix and keep it in the fridge for months. |
🤫 The Secret Ingredient
Okay, the secret isn’t really an “ingredient” you buy, but a ratio. The 8-4-1 Ratio.
Many people buy pre-made “Sushi Seasoning.” But making your own with this simple math makes it taste fresh and authentic without weird preservatives. 8 parts Rice Vinegar, 4 parts Sugar, 1 part Salt. It balances the sour, sweet, and salty perfectly.
🏥 Health Benefits
- Energy: Rice is a great source of carbohydrates for energy.
- Gluten-Free: Since we use rice vinegar and plain rice, this is naturally gluten-free (just check your soy sauce later!).
- Low Fat: Sushi rice itself has very little fat.
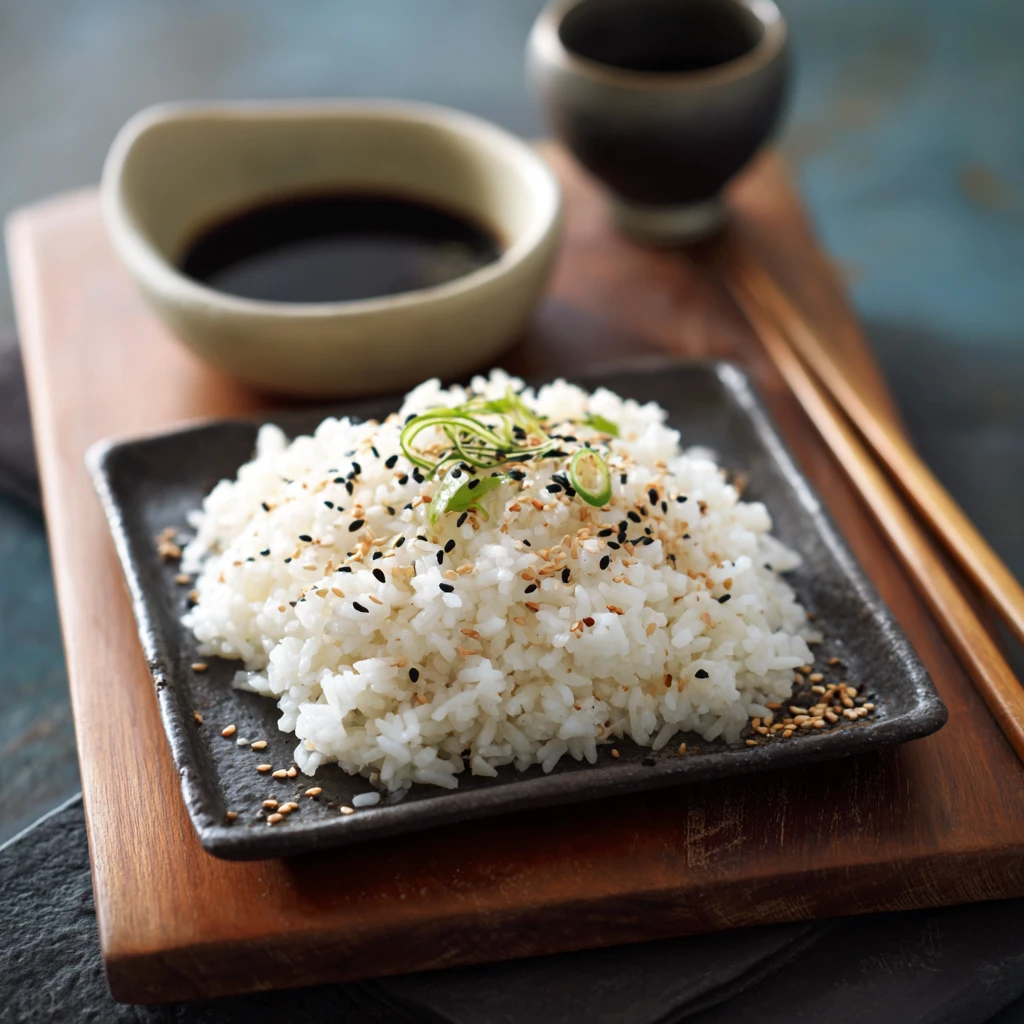
🥗 Serving Suggestions
Your rice is ready! Here is how to serve it:
- Classic Nigiri: Form small balls and top with fresh fish.
- Maki Rolls: Use seaweed sheets to make California rolls or spicy tuna rolls.
- Chirashi Bowl: Put a scoop of rice in a bowl and top with sashimi, avocado, and cucumber.
- Temaki: Hand rolls are fun for parties.
📦 Storage and Reheating
Sushi rice is a bit tricky. It is best eaten fresh.
- Room Temp: You can keep it covered with a damp cloth at room temperature for up to 4 hours.
- Fridge: If you must refrigerate it, put it in an airtight container. It will get hard.
- Reheating: To soften it again, microwave it with a damp paper towel on top for 30 seconds. It won’t be perfect for sushi rolls anymore, but it is fine for a bowl.
❌ Common Mistakes to Avoid
- Wrong Rice: Using long-grain rice like Jasmine. It won’t stick together.
- Skipping the Wash: If you don’t wash off the extra starch, the rice becomes a gummy paste.
- Lifting the Lid: Don’t peek while it is steaming! You let the heat out.
- Mashing the Rice: When mixing vinegar, be gentle. If you press too hard, you get mushy rice.
❓ FAQs
Q: Can I use apple cider vinegar?
A: I wouldn’t recommend it. Rice vinegar has a milder, sweeter flavor that is essential for that traditional taste.
Q: Why is my rice mushy?
A: You might have used too much water or soaked it for too long. Stick to the 1:1 ratio.
Q: Do I really need a wooden tub?
A: No, but it helps. The wood absorbs extra moisture. If using a glass bowl, just be careful not to let the vinegar pool at the bottom.
Q: How long does the vinegar mix last?
A: If you keep it in a sealed jar in the fridge, it lasts for months.
💭 Final Thoughts
Making sushi rice on the stove brings you back to the basics. It connects you to the process. There is something satisfying about watching the steam rise and smelling that sweet vinegar mix.
It might take one or two tries to get the heat on your stove just right, but don’t give up. Once you master this, you can have a sushi party whenever you want.
Thanks for stopping by my blog. Happy cooking!

