
Sweet And Sour Chicken Recipe: The Crispy, Tangy Classic You Can Make Better at Home
Sweet and sour chicken is one of those dishes that has achieved something remarkable — it is simultaneously a beloved staple of Chinese-American restaurant menus and a genuinely exciting home cooking project that rewards the effort put into it. The combination of crispy battered chicken coated in a glossy, vibrant sauce that balances tangy pineapple, sweet sugar, acidic vinegar, and savory soy sauce is a flavor experience that has earned devoted fans across every continent.
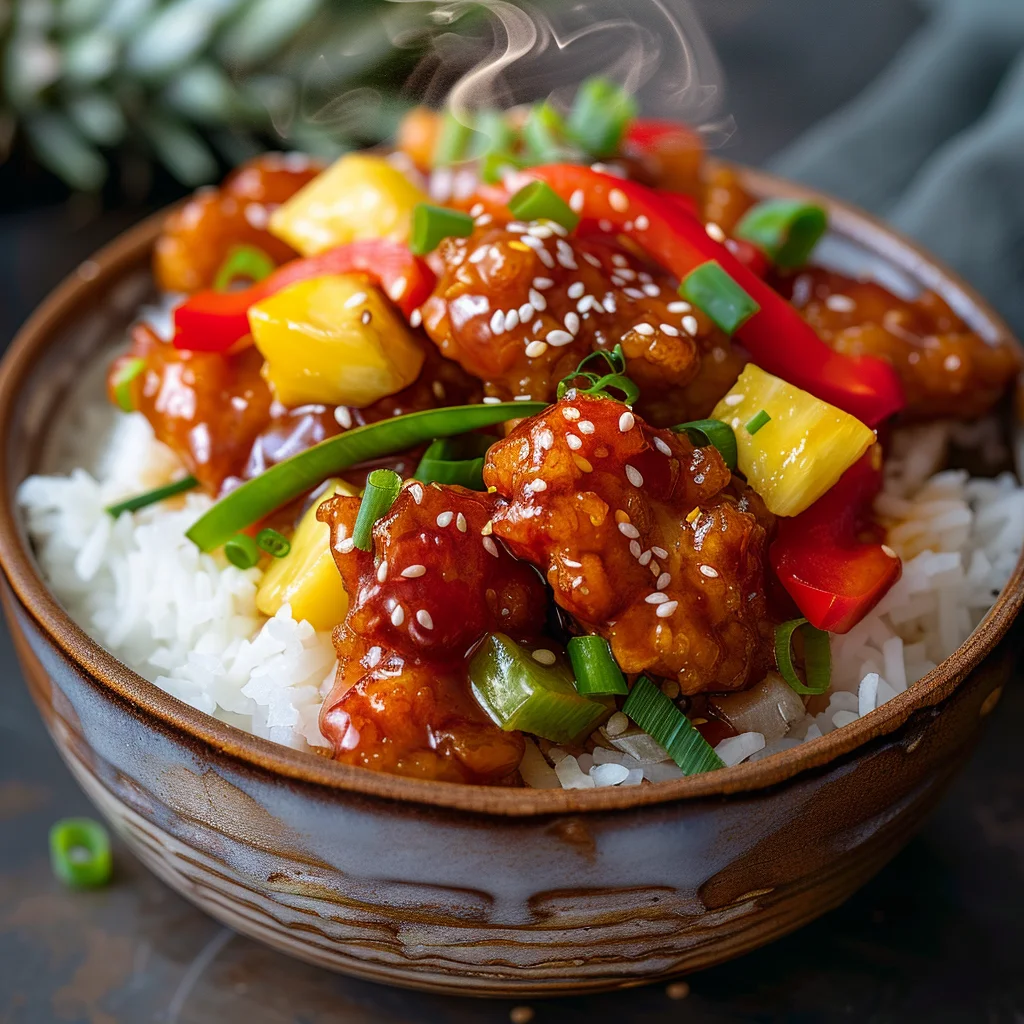
The version most people know — golden, crunchy pieces of chicken bathed in a bright orange-red sauce with bell peppers, pineapple chunks, and onion — comes from the Chinese-American culinary tradition that developed in the United States over the 20th century. While it differs from traditional Chinese sweet and sour preparations, it has developed its own identity as genuine comfort food with an intensely loyal following.
What this recipe demonstrates is that the restaurant version — as satisfying as it can be — is routinely surpassed by a well-made homemade version. Fresher ingredients, properly fried batter, and a sauce made from scratch without artificial colorings or thickeners produce a sweet and sour chicken that is crispier, more vibrant, more balanced, and more deeply flavored than almost anything available from a takeaway container.
This article covers everything — the key ingredients, a detailed step-by-step recipe, expert frying technique, sauce mastery, serving suggestions, creative variations, nutritional information, and a comprehensive FAQ section.
What Makes This Dish Work
Sweet and sour chicken succeeds through the tension between its contrasting elements. The chicken must be genuinely crispy — not just coated, but shatteringly crunchy — to provide textural contrast against the glossy, sticky sauce. The sauce must be truly balanced — not simply sweet with a hint of vinegar, but a genuine dance between all four flavor elements that keeps each bite interesting.
The batter is the first critical element. A light, cornstarch-heavy batter creates a crust that is crispier and holds up longer against the sauce than a flour-based one. The frying temperature must be high enough — 350°F to 375°F (175°C to 190°C) — to set the crust rapidly without absorbing excess oil.
The sauce is the second critical element. Many home versions rely on bottled sweet and sour sauce, which is acceptable but flat. A from-scratch sauce made with rice vinegar, ketchup, pineapple juice, soy sauce, sugar, and a cornstarch slurry to thicken takes five minutes to prepare and tastes dramatically better — brighter, more complex, and more genuinely balanced than any bottle can replicate.
Key Ingredients
The Chicken
Boneless, skinless chicken breast or thigh both work well, each with distinct advantages. Chicken breast produces cleaner, leaner pieces with a firm bite. Chicken thigh is juicier and more forgiving during frying — its higher fat content prevents drying even with slight overcooking. Cut into pieces approximately one to one and a half inches — large enough to have substantial interior tenderness after frying, small enough to cook through completely before the batter darkens.
The Batter
The batter determines the quality of the crust. A cornstarch-dominant batter produces the superior result for this dish.
Crispy Batter:
- ½ cup all-purpose flour
- ½ cup cornstarch
- 1 teaspoon baking powder
- ½ teaspoon garlic powder
- ½ teaspoon salt
- ¾ cup cold water (ice cold — this is important)
- 1 egg
Whisk together until just combined — a few lumps are acceptable and desirable. The batter should be the consistency of thin pancake batter. The cold water keeps the batter from developing too much gluten, producing a lighter, crispier crust. Avoid overworking it.
The Sweet and Sour Sauce
This sauce is what defines the entire dish. Made from scratch, it is genuinely outstanding.
From-Scratch Sweet and Sour Sauce:
- ½ cup rice vinegar or white wine vinegar
- ½ cup ketchup
- ½ cup pineapple juice (from the canned pineapple)
- ⅓ cup sugar
- 2 tablespoons soy sauce
- 1 tablespoon cornstarch mixed with 2 tablespoons water (slurry)
- Salt to taste
Combine the vinegar, ketchup, pineapple juice, sugar, and soy sauce in a saucepan. Bring to a simmer over medium heat, stirring until the sugar dissolves. Add the cornstarch slurry and stir constantly for 1 to 2 minutes until the sauce thickens to a glossy, coating consistency. Taste and adjust — more vinegar for tang, more sugar for sweetness, more soy for depth.
The sauce should be bold, noticeably tangy, and glossy. A flat or overly sweet sauce produces a flat dish — balance between all four flavor notes is essential.
The Vegetables and Pineapple
Bell peppers, onion, and pineapple chunks are the classic accompaniments. They are not fried — they are briefly stir-fried separately or added to the sauce directly so they retain some texture and freshness against the crispy chicken.
Red and green bell peppers — cut into one-inch pieces — add color, sweetness, and a mild crunch. White onion cut into similar chunks provides sharpness and aromatic depth. Pineapple chunks — from a can drained of their juice (which is used in the sauce) or fresh — contribute the tropical sweetness that defines the dish.
The Frying Oil
Neutral, high smoke-point oil is essential for frying. Vegetable oil, canola oil, sunflower oil, or avocado oil all work well. Use enough to completely submerge the chicken pieces — a depth of at least three inches in a deep pot or Dutch oven. Never fry in a shallow layer of oil — the uneven heat distribution produces inconsistent results and the batter steams on the submerged side rather than crisping.
Step-by-Step Recipe
Prep Time: 20 minutes Cook Time: 25 minutes Total Time: 45 minutes Servings: 4
Ingredients
For the chicken:
- 1.5 lbs boneless, skinless chicken breast or thigh, cut into 1-inch pieces
- 1 teaspoon soy sauce
- 1 teaspoon garlic powder
- Salt and white pepper to taste
For the batter:
- ½ cup all-purpose flour
- ½ cup cornstarch
- 1 teaspoon baking powder
- ½ teaspoon garlic powder
- ½ teaspoon salt
- ¾ cup ice cold water
- 1 egg
For the sauce:
- ½ cup rice vinegar
- ½ cup ketchup
- ½ cup pineapple juice
- ⅓ cup sugar
- 2 tablespoons soy sauce
- 1 tablespoon cornstarch + 2 tablespoons water
For the stir-fry:
- 1 red bell pepper, cut into 1-inch pieces
- 1 green bell pepper, cut into 1-inch pieces
- 1 medium white onion, cut into 1-inch chunks
- 1 cup pineapple chunks (canned or fresh)
- 1 tablespoon neutral oil
For frying:
- Neutral oil for deep frying (vegetable or canola)
Instructions
Step 1 — Season the chicken. Toss the chicken pieces with one teaspoon of soy sauce, garlic powder, salt, and white pepper. Allow to sit for 10 minutes at room temperature while you prepare the batter and sauce.
Step 2 — Make the sauce. Combine the rice vinegar, ketchup, pineapple juice, sugar, and soy sauce in a small saucepan. Stir over medium heat until the sugar dissolves completely and the mixture comes to a gentle simmer. Add the cornstarch slurry and stir constantly for 1 to 2 minutes until glossy and thick enough to coat the back of a spoon. Remove from heat and set aside.
Step 3 — Make the batter. Whisk the flour, cornstarch, baking powder, garlic powder, and salt together in a bowl. Add the egg and ice cold water. Whisk until just combined — do not overwork. The consistency should be like thin pancake batter. Keep the batter cold by placing the bowl over ice if the kitchen is warm.
Step 4 — Heat the oil. Pour neutral oil into a deep pot or Dutch oven to a depth of at least 3 inches. Heat over medium-high heat to 365°F (185°C). Use a kitchen thermometer — oil temperature accuracy is essential for proper frying. If the oil is too cool, the batter absorbs oil and becomes greasy. If too hot, the batter browns before the chicken cooks through.
Step 5 — Fry the chicken. Working in batches of 6 to 8 pieces at a time — never crowd the pot — dip each piece of chicken into the batter, allowing excess to drip off for a second, then gently lower into the hot oil. Fry for 4 to 5 minutes, turning once halfway through, until the batter is deep golden and the internal temperature of the chicken reaches 165°F (74°C). Remove with a spider strainer or slotted spoon and drain on a wire rack set over a baking sheet — not paper towels, which trap steam and soften the crust. Allow the oil to return to 365°F between batches.
Step 6 — Double fry for maximum crispiness (optional but recommended). After all the chicken has been fried once and cooled for two minutes, increase the oil temperature to 385°F (195°C) and fry all the chicken again for 60 to 90 seconds until it reaches a deeper golden color and the crust becomes noticeably crispier. This double-fry technique — used throughout Asian fried chicken cooking — produces a crust that stays crispy significantly longer after saucing.
Step 7 — Stir-fry the vegetables. In a large wok or wide skillet, heat one tablespoon of oil over high heat until smoking. Add the bell peppers and onion and stir-fry for 2 minutes until slightly softened but still maintaining crunch. Add the pineapple chunks and toss for 30 seconds.
Step 8 — Combine and serve. Reheat the sauce over medium heat until bubbling. Add the fried chicken to the wok with the vegetables and pour the hot sauce over everything. Toss quickly and decisively — 20 to 30 seconds maximum — to coat every piece evenly. Serve immediately over steamed jasmine rice.
Expert Tips
Use ice cold water in the batter. Cold water prevents gluten development, resulting in a lighter, crispier crust. Add ice cubes to the water before measuring and discard them before use. The difference between room-temperature water and ice water in the finished crust is immediately noticeable.
Do not crowd the frying pot. Adding too many pieces at once drops the oil temperature dramatically, causing the batter to absorb oil rather than crisp. Fry in small batches and allow the oil to return to temperature between each batch.
Use a wire rack, not paper towels. Paper towels trap steam beneath the fried chicken, softening the crust from underneath within minutes. A wire rack allows air to circulate on all sides, keeping the crust crispy.
Double fry for the best crust. The double-fry technique is the single most impactful technique for producing a crust that stays crispy even after saucing. The first fry cooks the chicken through. The second fry crisps the batter to a shatteringly crunchy exterior that holds up against the sauce far longer than a single-fried crust.
Toss the chicken in sauce quickly. Once the sauce coats the chicken, the crust begins to soften. Serve immediately after saucing — do not let it sit. The window between perfectly sauced crispy chicken and soggy chicken is short. Have the rice and the plates ready before the final toss.
Balance the sauce before cooking. Taste the sauce before it goes near the chicken. Adjust the balance of sweet, sour, savory, and tangy at this stage — once it is on the chicken there is no opportunity to correct it effectively. The sauce should taste pleasantly complex and slightly more intense than seems right — it mellows once it coats the chicken and rice.
Serving Suggestions
Sweet and sour chicken is traditionally served over steamed jasmine rice, which absorbs the glossy sauce beautifully and provides the neutral, starchy counterpoint that balances the bold flavors of the dish. Long-grain white rice is the classic choice. Fried rice works well for a more indulgent version. Brown rice adds fiber and a nuttier flavor.
For a more complete Chinese-American inspired meal, serve alongside egg fried rice, steamed dumplings, spring rolls, or a simple stir-fried vegetable dish — bok choy, broccoli, or snap peas tossed in garlic and soy sauce. The fresh, lightly cooked vegetables provide a clean, simple contrast to the bold, sauced chicken.
Noodles — steamed lo mein or simple rice noodles tossed in a small amount of sesame oil and soy sauce — are an excellent alternative to rice and absorb the sweet and sour sauce equally well.
Creative Variations
Baked Sweet and Sour Chicken: Coat the chicken pieces in the batter and place on a well-oiled wire rack over a baking sheet. Bake at 425°F (220°C) for 20 to 22 minutes, flipping halfway through, until golden and cooked through. Toss with the sauce as directed. The baked version is less crispy than deep-fried but significantly lighter and still genuinely delicious.
Air Fryer Sweet and Sour Chicken: Spray battered chicken pieces generously with cooking oil spray. Air fry at 400°F (200°C) for 14 to 16 minutes, flipping halfway, until golden and cooked through. The air fryer produces an impressive crust with a fraction of the oil used in deep frying.
Sweet and Sour Pork: Replace chicken with thinly sliced pork tenderloin or pork belly cut into similar-sized pieces. The slightly richer, fattier character of pork suits the sweet and sour sauce beautifully and is the more traditional Chinese preparation.
Sweet and Sour Shrimp: Coat large shrimp in the batter and fry for 2 to 3 minutes until golden. The shrimp cook much faster than chicken — watch carefully to avoid overcooking. The sweetness of the shrimp against the tangy sauce is a genuinely outstanding combination.
Pineapple Coconut Sweet and Sour Chicken: Replace half the pineapple juice in the sauce with coconut milk for a slightly creamier, tropical version with a more Southeast Asian character.
Nutritional Information
A standard serving of sweet and sour chicken with sauce and vegetables served over half a cup of steamed rice provides approximately 520 to 600 calories, 32 to 38 grams of protein, 58 to 68 grams of carbohydrates, and 14 to 20 grams of fat.
Chicken breast provides complete protein with all essential amino acids alongside B vitamins and selenium. Bell peppers are exceptional sources of vitamin C — red bell peppers in particular contain more vitamin C per gram than most citrus fruits. Pineapple contributes bromelain — a digestive enzyme — alongside vitamin C and manganese.
For a lighter version, use the baked or air fryer method, reduce the sugar in the sauce by half and add a tablespoon of honey for a more natural sweetness, and serve over cauliflower rice. These adjustments reduce calories to approximately 380 to 440 per serving while preserving the defining sweet and sour character.
Frequently Asked Questions
Q1. How do I keep the chicken crispy after adding the sauce?
Double frying is the most effective technique for maintaining crispiness after saucing. The second fry at a higher temperature creates a denser, more moisture-resistant crust. Beyond technique, serve immediately after tossing in the sauce — the longer sauced chicken sits, the softer it becomes. Have everything ready before the final toss: hot plates, steamed rice, and family at the table.
Q2. Can I make the sauce less sweet?
Yes. Reduce the sugar gradually — start by cutting it by two tablespoons and taste. Adding an extra tablespoon of rice vinegar while reducing sugar maintains the balance between sweet and sour rather than simply making the sauce less sweet overall. A tablespoon of honey can replace some of the refined sugar for a more complex, less cloying sweetness.
Q3. Can I prepare components ahead of time?
Yes. The sauce can be made up to five days in advance and refrigerated. The chicken can be cut, seasoned, and refrigerated for up to 24 hours before battering and frying. The vegetables can be cut and refrigerated. However, the frying and final toss must be done fresh immediately before serving — fried and sauced chicken does not hold well and deteriorates quickly.
Q4. Why is my batter falling off the chicken during frying?
Batter falls off for three reasons. The chicken surface is wet — pat each piece completely dry before dipping in batter. The batter is too thin — adjust with a small addition of flour until it coats the back of a spoon. The oil is not hot enough — insufficient heat causes the batter to loosen from the chicken before it sets. Ensure the oil is at 365°F before adding any chicken.
Q5. Can I use a store-bought sweet and sour sauce?
Yes — store-bought sauce is a legitimate time-saving shortcut that produces a good result. Heat it in a pan, adjust the flavor with a splash of rice vinegar for more tang or a pinch of sugar for more sweetness, and use as directed. The from-scratch version is noticeably better in flavor and balance, but a quality store-bought sauce produces a perfectly enjoyable dish.
Q6. What oil is best for frying the chicken?
Any neutral, high smoke-point oil works well — vegetable oil, canola oil, sunflower oil, and avocado oil are all appropriate choices. Avoid olive oil, which has a lower smoke point and a flavor that clashes with the Asian-inspired dish. The oil should be clean and fresh — reused oil with many previous frying sessions produces off-flavors that transfer to the chicken.
Q7. Can I make this dish gluten-free?
Yes. Replace the all-purpose flour in the batter with rice flour — it produces an even crispier crust than wheat flour and is naturally gluten-free. Use tamari instead of soy sauce throughout the recipe. Ensure the ketchup is gluten-free — most standard brands are, but always check the label. All other components are naturally gluten-free.
Q8. How do I store and reheat leftovers?
Store the fried chicken and sauce separately in airtight containers in the refrigerator for up to three days. To reheat, re-fry the chicken in hot oil for 60 to 90 seconds or use an air fryer at 400°F for four to five minutes to restore crispiness. Reheat the sauce separately in a small saucepan. Toss together immediately before serving. Reheating already-sauced chicken in a microwave produces soft, unappealing results.
Conclusion
Sweet and sour chicken made properly at home is genuinely superior to restaurant versions in almost every measurable way — crispier batter, brighter sauce, fresher vegetables, and the satisfaction of producing something genuinely spectacular from your own kitchen. The technique requires attention — cold batter, properly heated oil, small frying batches, and the double-fry method — but none of it is difficult. It is careful, attentive cooking, and the result justifies every minute of that care.
Master the batter, balance the sauce, fry at the correct temperature, and serve immediately after the final toss. Do these things and every plate of sweet and sour chicken you produce will be crispy, glossy, perfectly balanced between sweet and sour, and deeply satisfying — the kind of homemade version that makes the takeaway original feel like a distant memory.


